Set up a funding and service details
Once one or more suppliers has been chosen and the business owner (the project's P2i Senior Director) has approved the outcome of the RFQ, the P2i Senior User can begin by setting up a Funding and Services Details if required. If more than one organisation has been selected set up the Funding and Services Details for each organisation.
If the Funding and Services Details already exists, create the funding schedule (refer to the topic Setting up a funding schedule), reference the existing Funding and Services Details in the Additional Information and link the funding schedule to the Funding and Services Details. Then attach the funding schedule and signed variation documents to the existing Funding and Services Details.
Watch the video on how to set up a funding and service details.
-
To set up the Funding and Services Details:
-
Login to Buyer Sourcing in P2i.
-
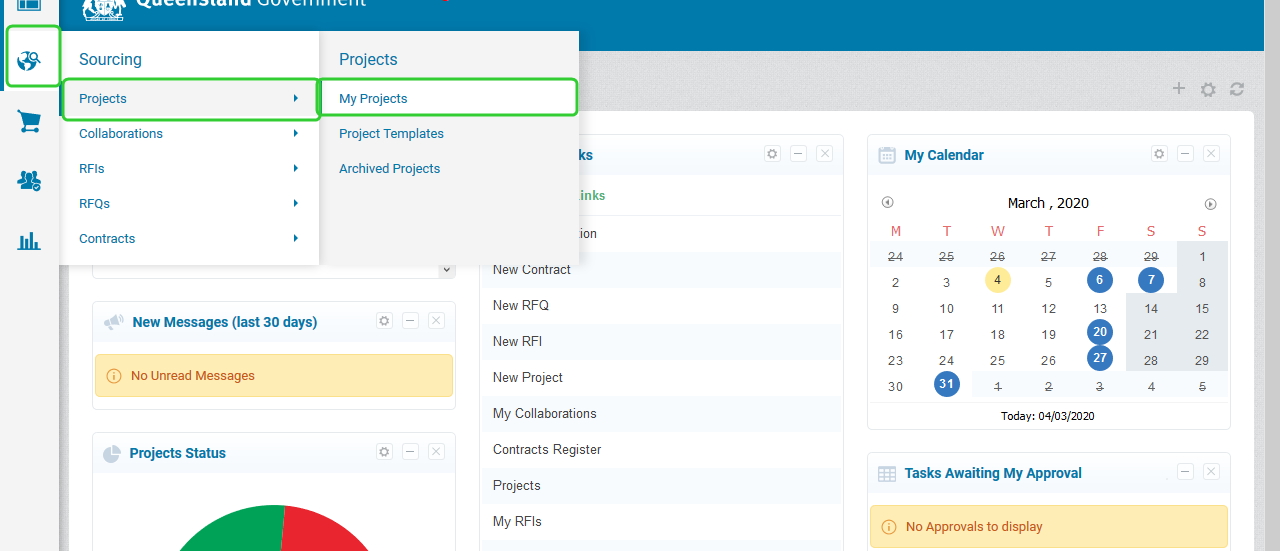
Click the Sourcing icon and click Projects and then click My Projects.
-
Click Create From Template.

-
Select the Social Services Procurement - FSD template and click Select.

-
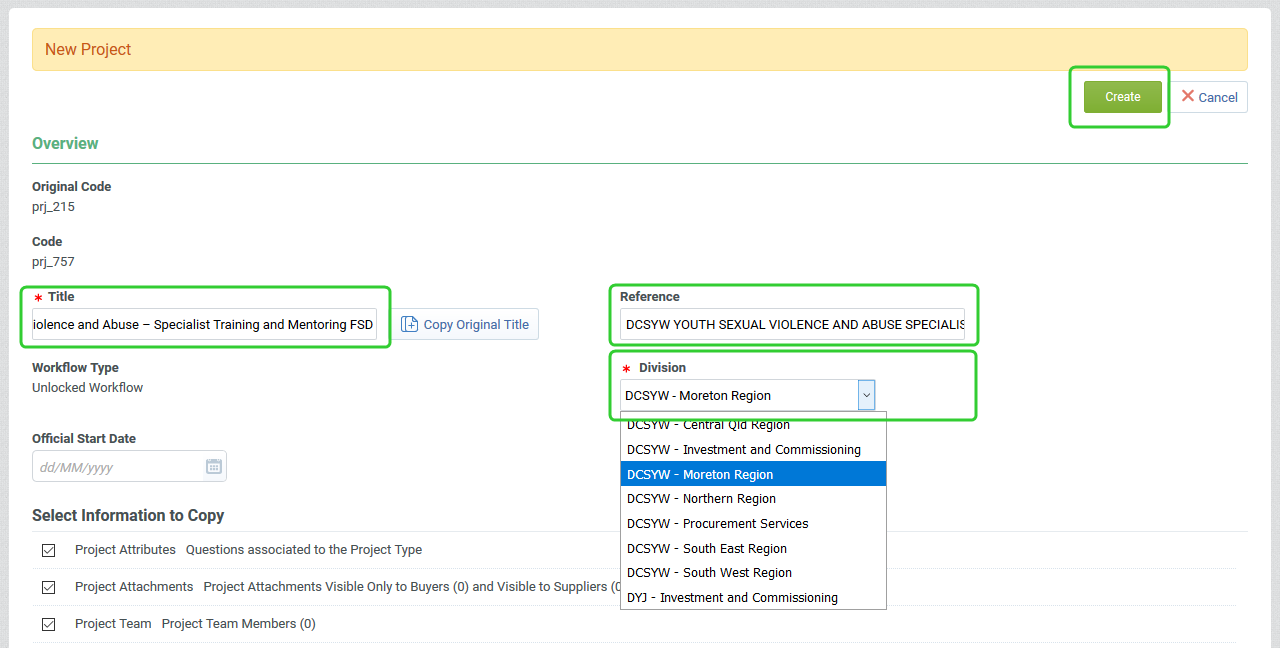
Enter a Project Title, Project Reference and select a Division.
Note Follow your department's rules for naming your project. For example, Department/Name of Program FSD
DCSSDS Youth at Risk FSD
Consistently naming your Project Title allows it to be easily searched later and improves reporting.
-
Click Create.
-
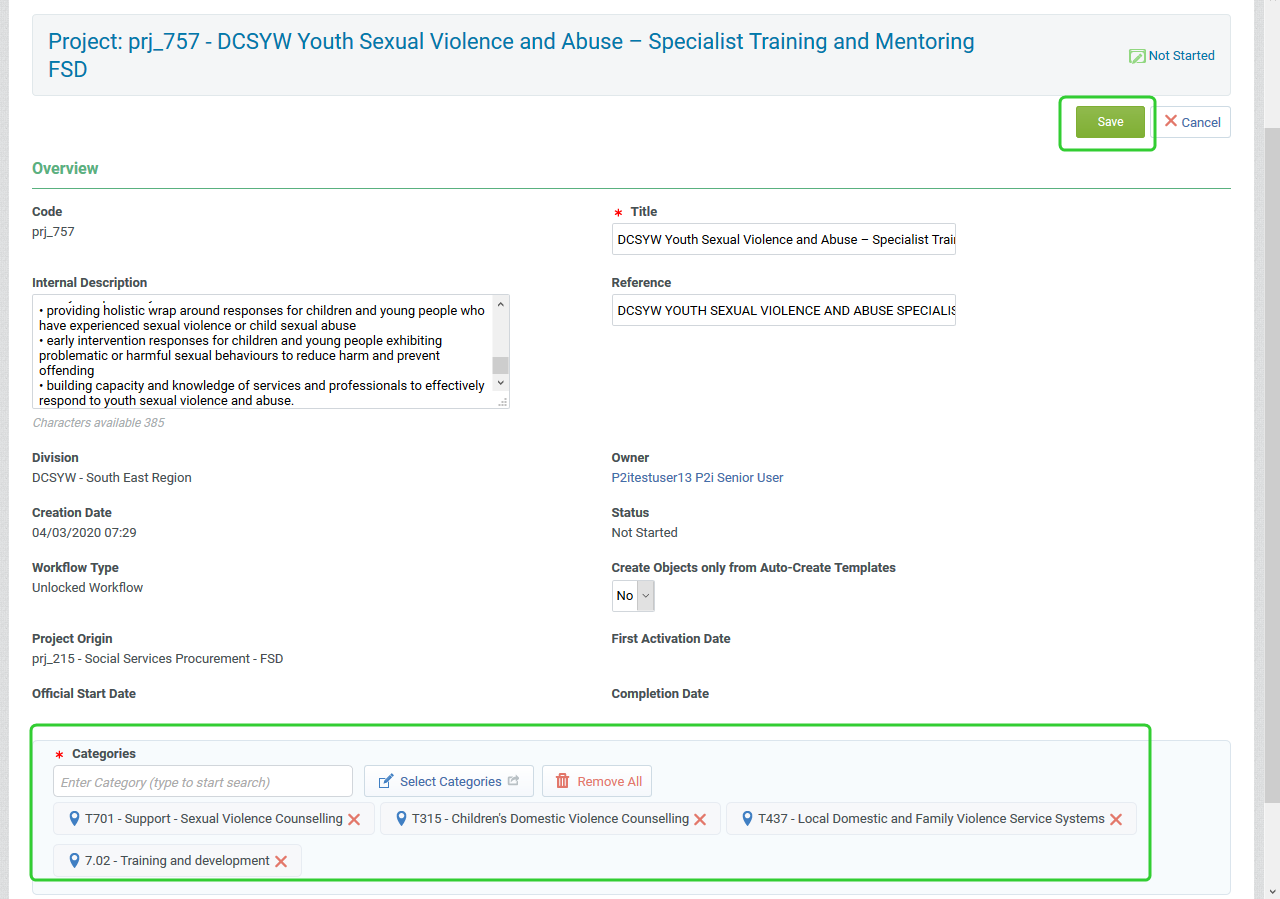
Enter one or more Categories depending on the focus of the project.
-
Click Save.
-
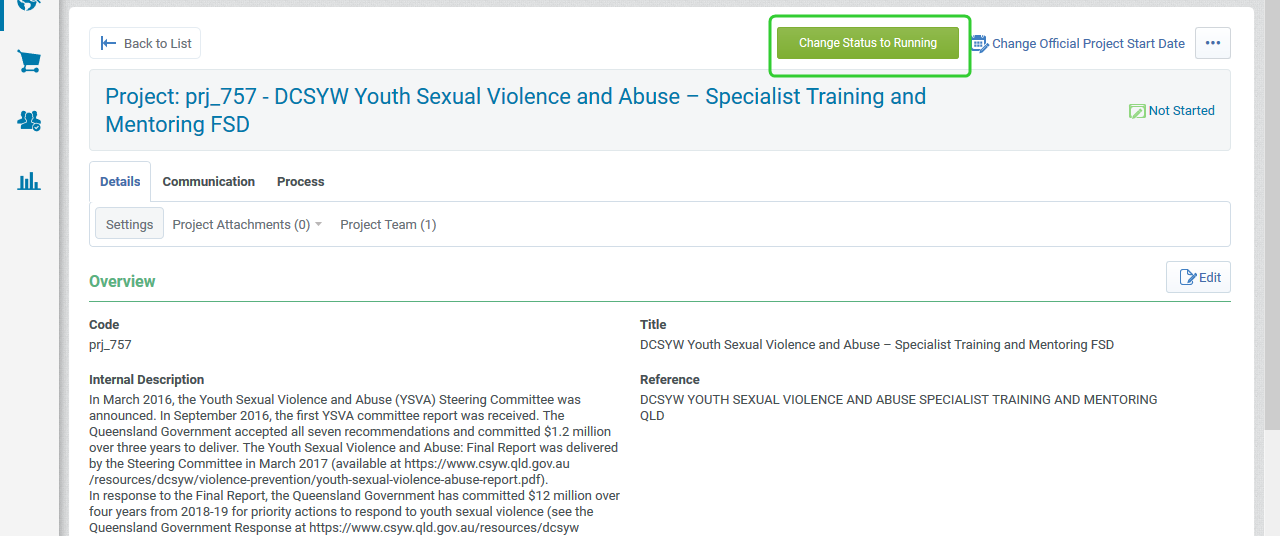
Review the Project Header and click Change Status to Running.
Tip Refer to the topic Creating a New RFQ Procurement Project for details on how to Project Attachments and Project Team Members.
-
Click Start Project.

-
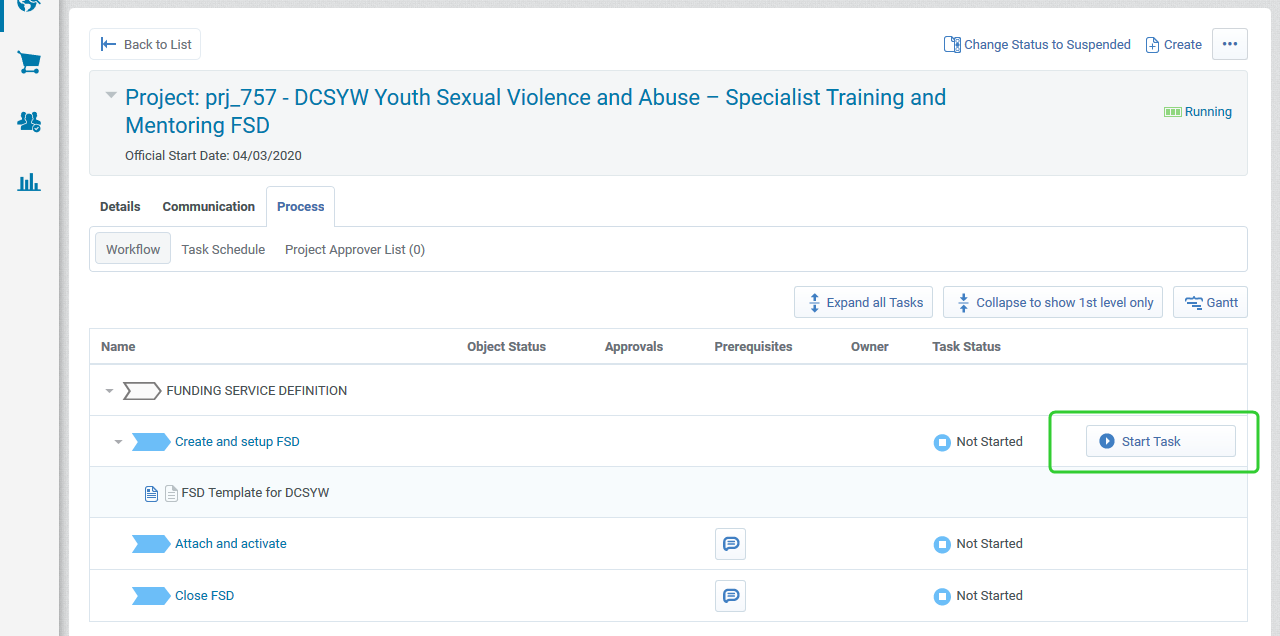
Click Start Task next to the Setup FSD task.
-
Click Confirm.
-
Click Confirm.
-
Click Create next to the FSD Template link in the Auto Create Template links section.
Note Templates have not been finalised for all departments. You are required to create a Funding and Service Details using the template in P2i and complete the processes below. Complete your Departments service agreement template offline and send to the supplier for wet signature. Attach the signed service agreement as per the instructions in the steps below: Attaching and activating the Funding and Services Details.

-
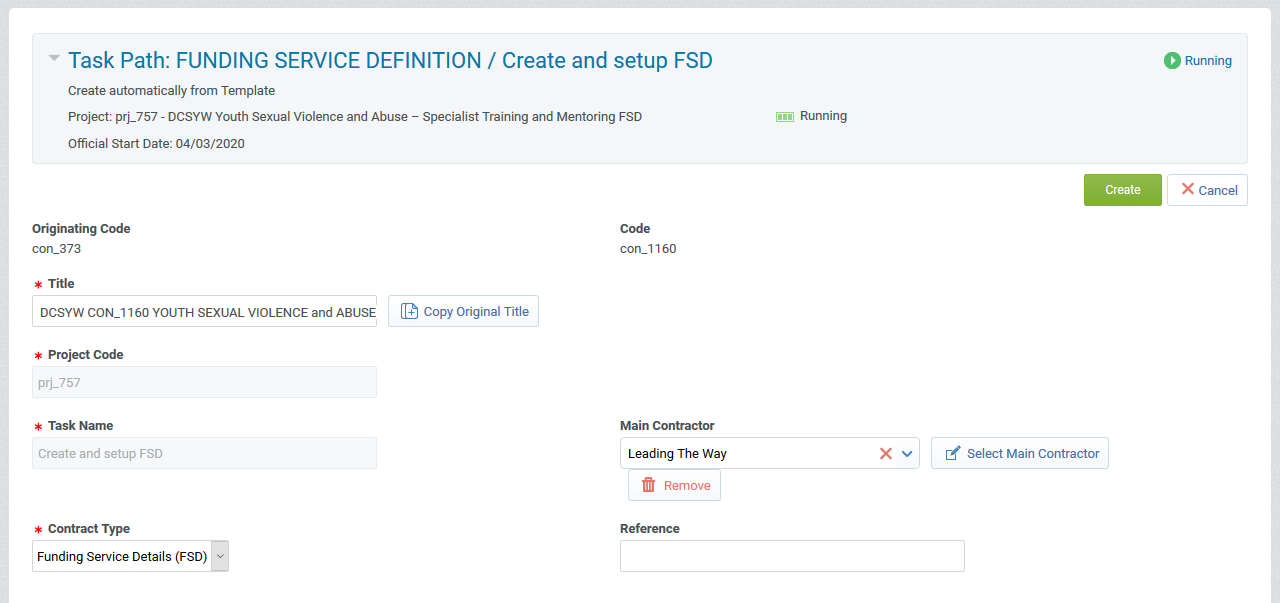
Enter the Contract Title.
Note Follow your department's rules for naming your Funding and Services Details. For example,
Department/Contract Number/Program FSDDCSSDS CON_123 YOUTH AT RISK
Consistently naming your Contract Title allows it to be easily searched later and improves reporting.
-
Enter or select the Main Contractor.
-
Click Create.
-
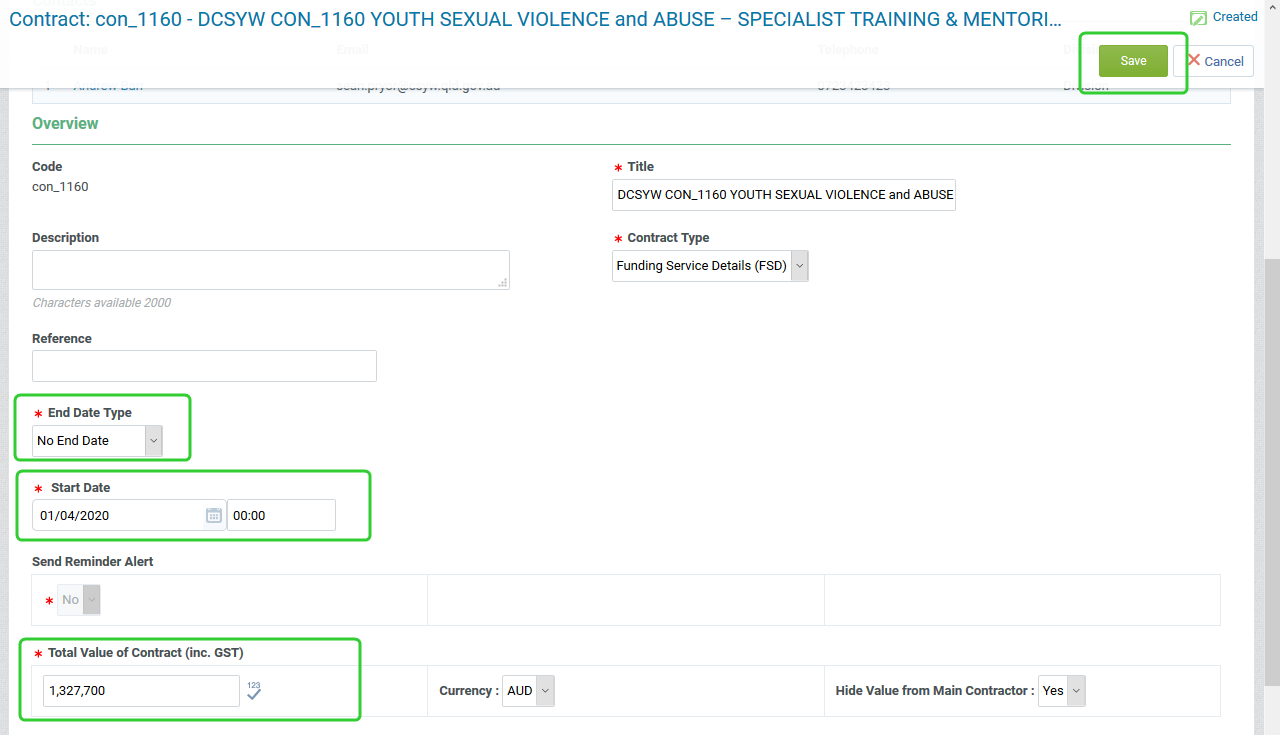
Complete the Overview form including the Start Date.
-
Enter the Total Value of the Contract (inc. GST).
-
Click Save.
-
Click Back to List (at the top of the screen).
-
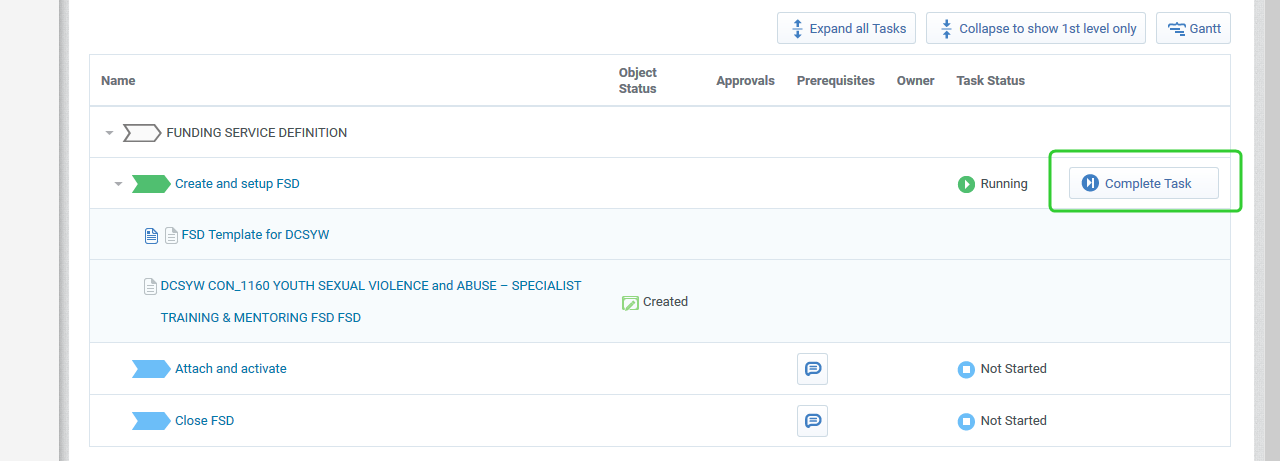
Click Complete Task.
-
Click Confirm.
-
Click Confirm.
Tip When setting up a project for the Funding and Services Details, reference the Procurement Project and/or RFQ that the Funding and Services Details is related to.
Warning The Start Date is the Agreement Commencement Date in the Funding and Service Details. Leave the End Date Type set to No End Date as the Funding and Services Details remains active until the date of expiry or termination of the last remaining funding schedule.
Warning The Budget Tool is always the source of truth for the total values of the funding and service detail.
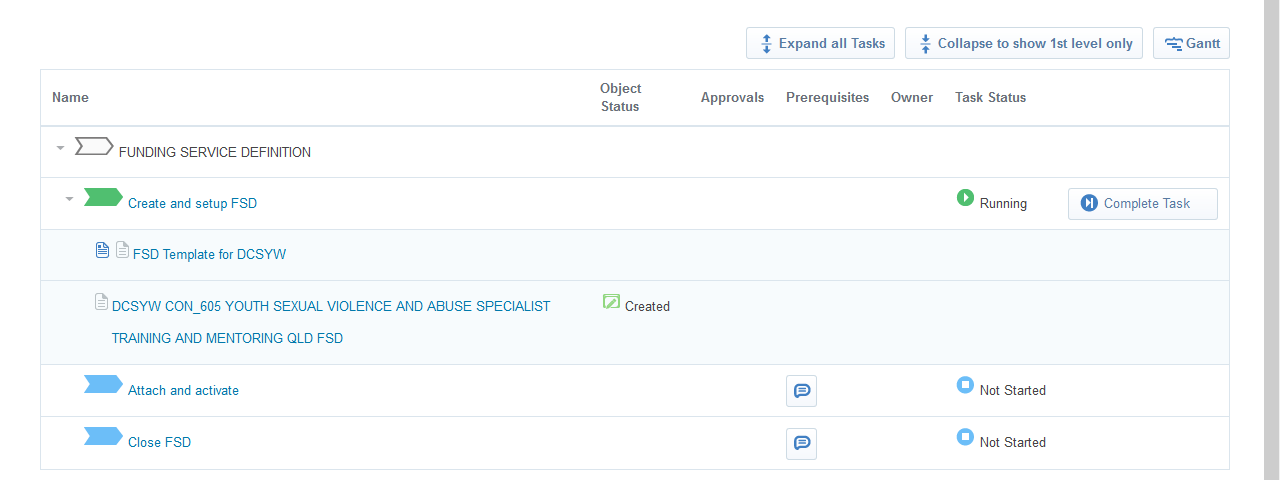
Completing the create and setup FSD task
Follow the process for creating, set-up and approval of the associated funding schedule. Send the documents to the funded organisation to be signed. The same process will be used where there is a variation to the Funding and Services Details. Use the appropriate variation document and have it signed. Create a new proposal as outlined in the steps below and attach the signed variation documents to the proposal. Once the contracts have been returned, you can complete the Create and setup FSD task.
-
Click Complete Task.
-
Click Confirm.
-
Click Confirm.
Attaching the Funding and Services Details
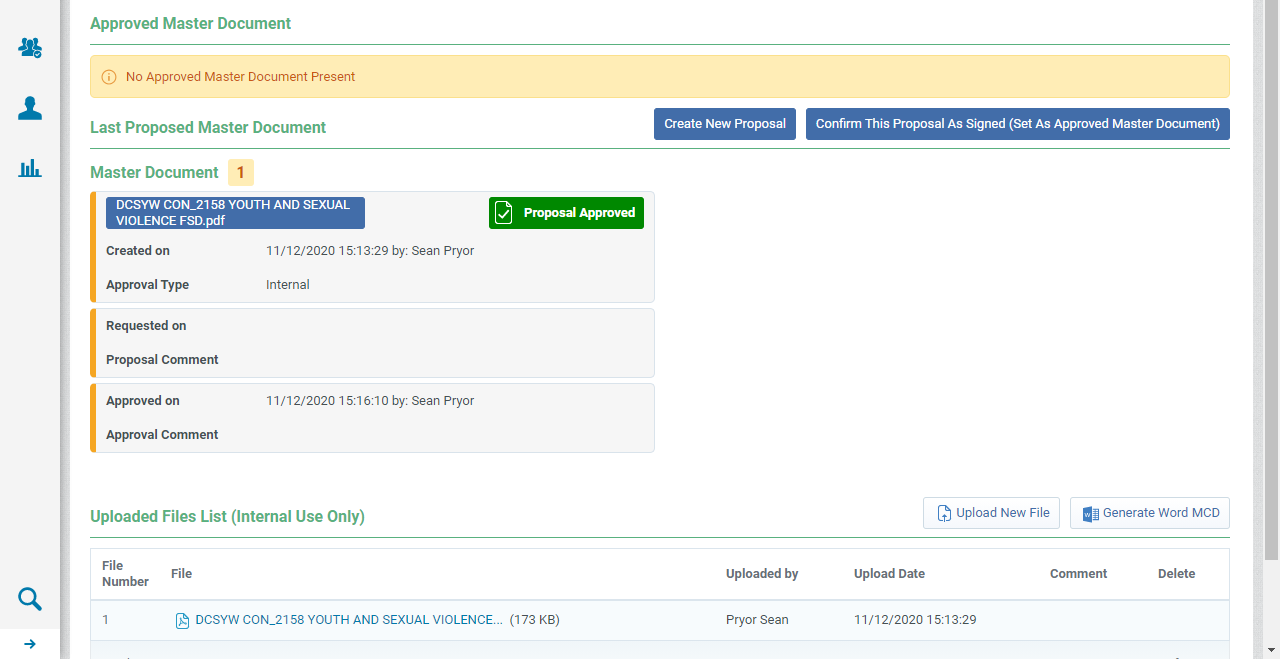
Once the Funding and Services Details with appended funding schedule has been co-signed, save the wet signature Funding and Services Details or variation (including the funding schedule) in the Master Document section of the Funding and Services Details and confirm the proposal as signed.
To attach the contract:
-
Open the Funding and Services Details contract.
-
Click the Contents Management tab and select Master Document.
-
Click Create New Proposal.

-
Under Select Proposal Origin select From a new File.

-
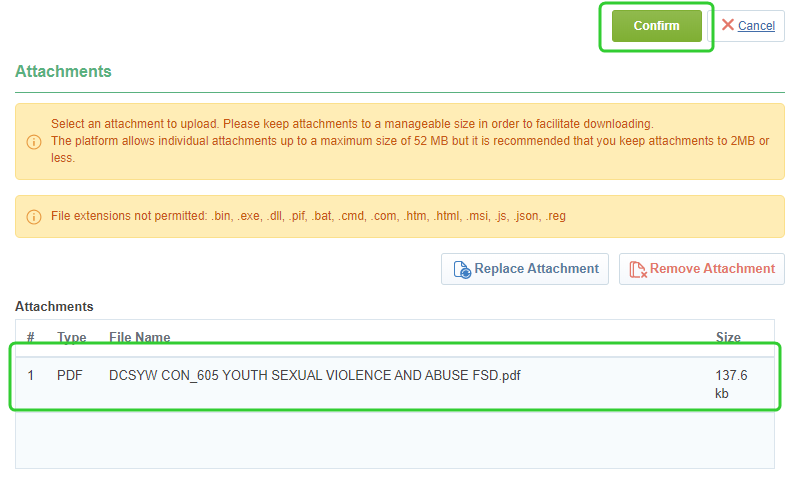
Drag and drop the Funding and Services Details or (Variation) and associated funding schedule or Select a File to Upload.
-
Click Confirm.
-
Click Create New Proposal.

-
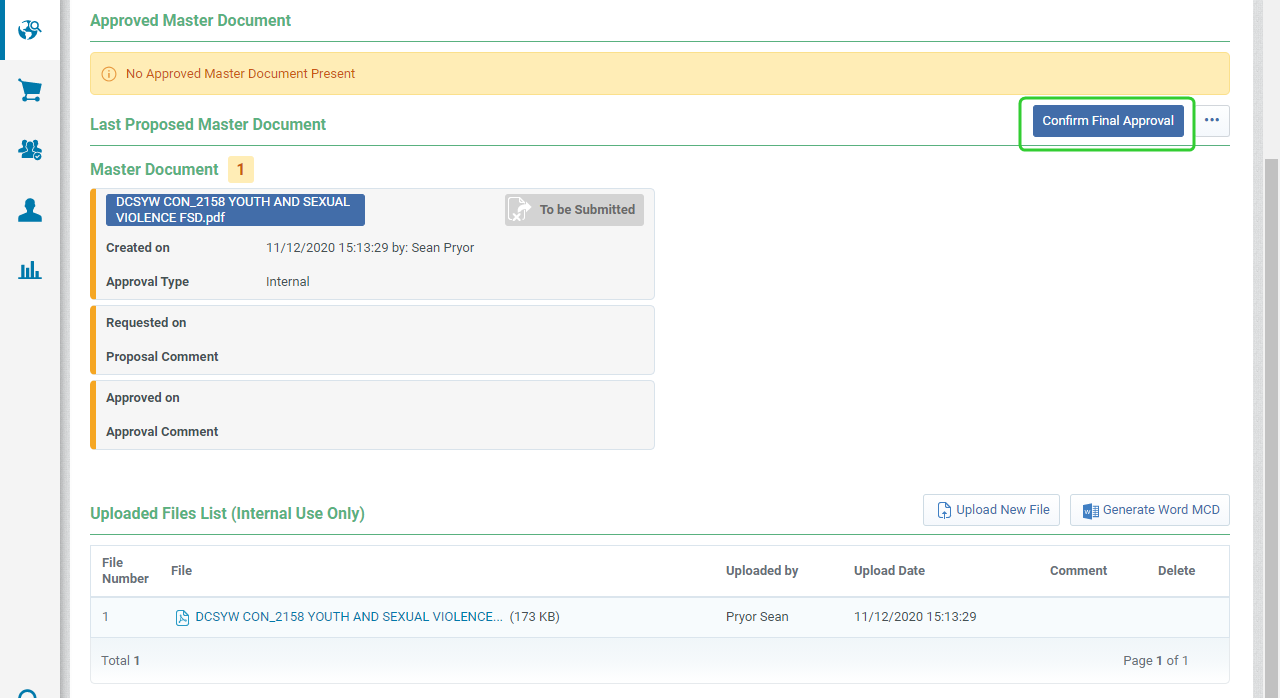
Click Confirm Final Approval.
-
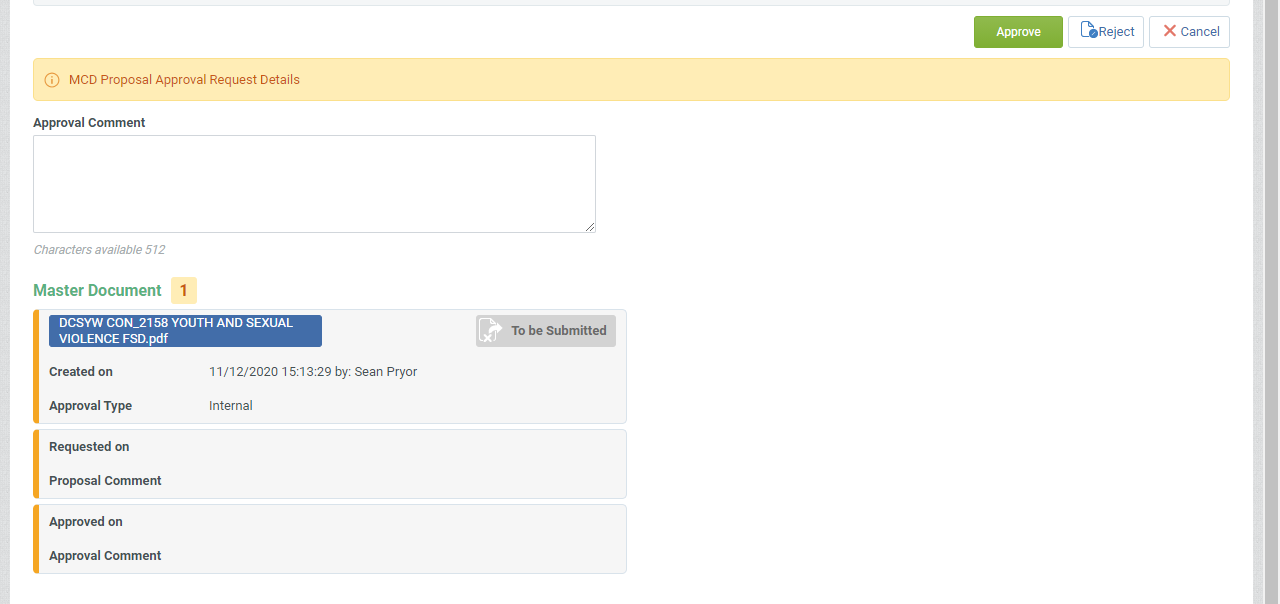
Click Approve.
-
Click Confirm This Proposal As Signed (Set As Approved Master Document).
Note The Funding and Services Details and Funding Schedule can be activated by the Contract Officer. Add the Contract Officer to the Project Team before making them the Contract Manager in P2i.
-
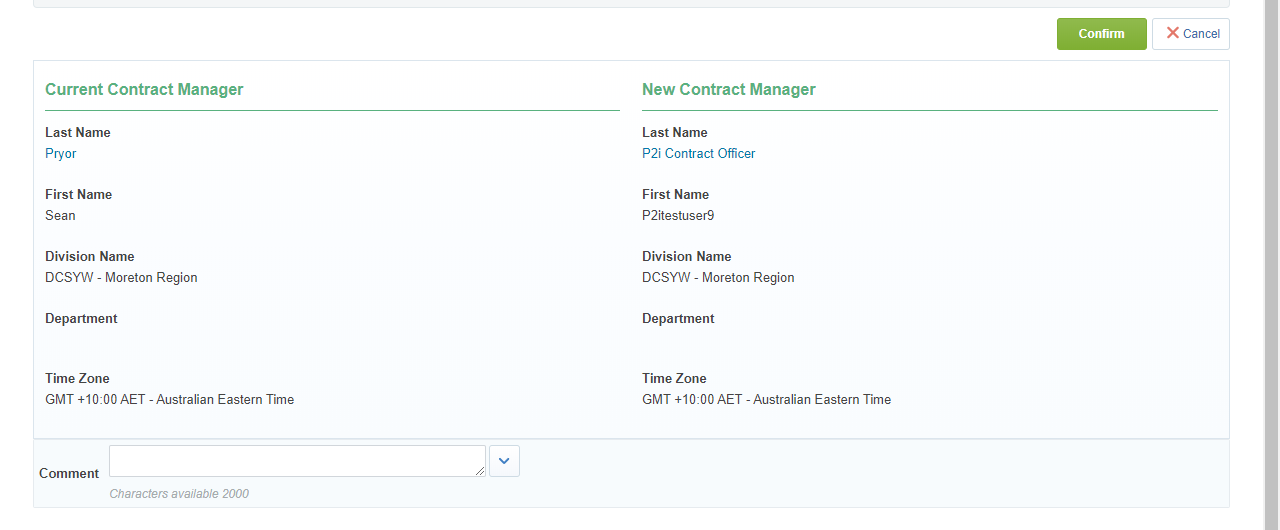
Click the ... button and select Change Contract Manager.

-
Search for and select the Contract Officer.

-
Click Confirm.
Note Inform the Contract Officer to log in to P2i and Activate the Funding and Services Details.
Activate the Funding and Services Details
-
The P2i Contract Officer can now activate the Funding and Services Details
-
Log in to P2i
-
Click the Contracts Register in Quick Links.

-
Click the Contract Title/link
-
Click Activate Contract.

-
Click Ok to Confirm.
-
Click Confirm.
Completing the Attach and activate task
Once the Funding and Services Details has been attached and activated, complete the task.
-
Click Complete Task.

-
Click Confirm.
-
Click Confirm.
Note The Funding and Services Details will remain active until the last funding schedule has been closed or terminated. You must complete the Close FSD task.